
Hello! This is Omar from Lizardcube. I am the technical director and programmer for our upcoming game. For this first post, I would like to talk a little about some of the technicalities behind our remake of Wonder Boy: The Dragon’s Trap.
Warning: This post is going to be very technical! It’s absolutely OK not to understand everything! I thought it would be cool to try to explain and convey some of the aspects behind making the game. Future blog posts will talk about various topics, including more readable ones. :)
When we decided to remake The Dragon’s Trap, one of the primary goals we set for ourselves was to make a game that is faithful and respectful to the original in terms of gameplay. We want players to feel “at home” (home being Monster World!) when they hold the controller. That means that we need to be particularly accurate in terms of controls and gameplay mechanics. We want the timings, physics, and reactions to feel just right and not like a cheap remake.
The original game also has lots of unknowns:
- How are hit points calculated?
- What are the rules behind item drops?
- What are the rules behind potion refills?
- How are hit boxes animated?
- Why is there a Cyclops in that underwater box?
- What equations are driving the character physics?
- Have we even found all the secrets…?
We don’t want to replicate all of it by guesswork and lose some the original magic due to translation. So I went and started digging into the original code…
How to extract the game data (the hard way)
My plan was to do this thing right and start from the beginning. I took an original game cartridge and dumped it to extract its contents. Those who know me from retro gaming forums may know I have an obsession for old Sega 8-bit games. That’s the sort of thing I do to my cartridges:
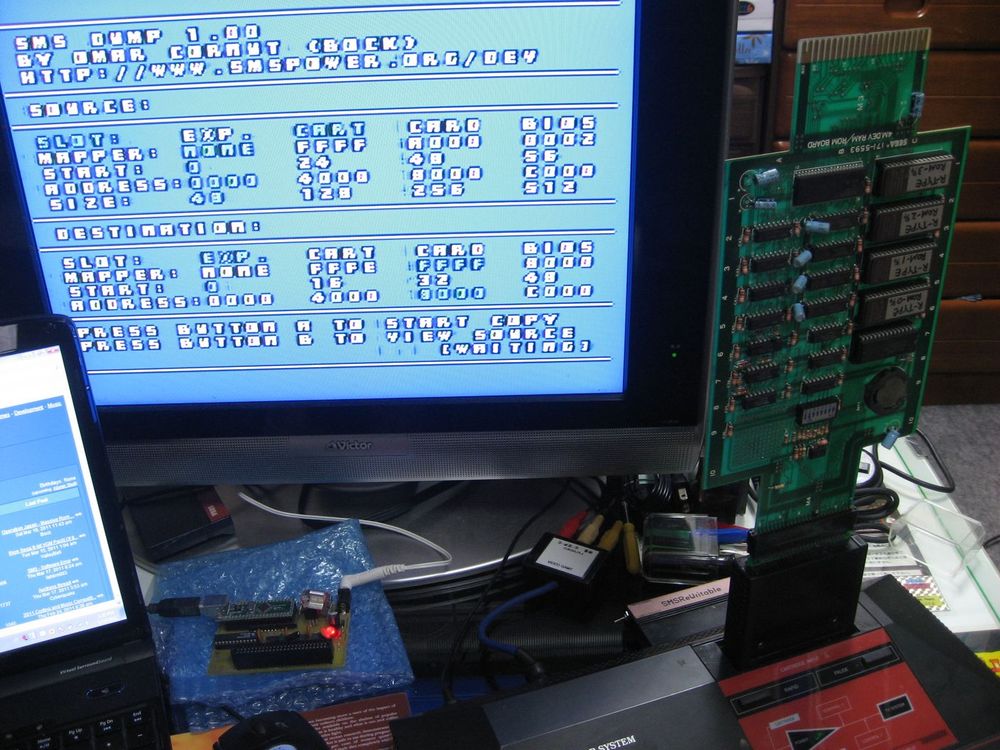
(Pictured above, for dramatic purposes, is a prototype version of R-Type. It comes on a bulky long board that the developers used in 1987 (Compile made this version!). I plugged the board into a homemade adapter as this is a Japanese console. The back of the console exposes an extension port originally designed for potential accessories (which never saw the light of day). We used it here by plugging a custom-made gender adapter as well as a writeable cartridge on it, carrying a simple software I wrote for the Master System, in Z80 assembly. The software runs on the console, copies itself into RAM, then resumes execution from there. The code in RAM then deactivates the cartridge it booted from, reads the game cartridge data (here my R-Type prototype, but the same process works with our Wonder Boy III cartridge), reactivates the writeable cartridge (plugged in the back) and writes the game data to it. The writeable cartridge is battery-backed and can be unplugged while keeping its content safe. I then proceeded to unplug everything and could then read the cartridge back from my PC using a custom made SmsReader. Reading the original cartridge from the console itself ensures we access it with the same timings a real Z80 CPU would use, maximizing compatibility for cartridges that might require precise timings. All those weird custom pieces of hardware have been designed and built by members of the SmsPower community such as Mike Gordon and Charles MacDonald.)
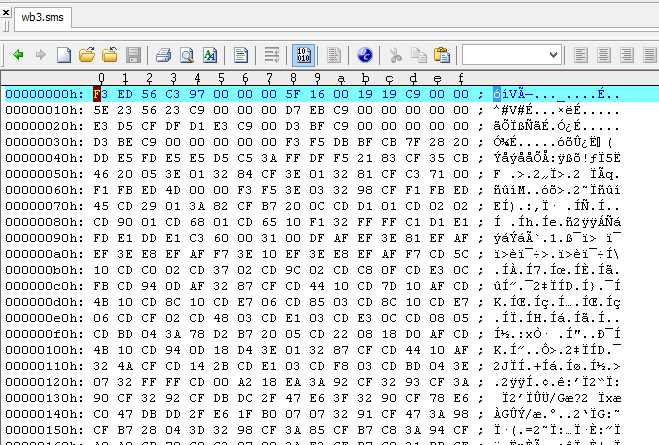
So we’ve extracted the data from the original game! The data fits in a 256 kilobytes file, AKA 262144 unique bytes. We can examine them with an hex-editor but it won’t make a lot of sense at first:
Reading the code
All the details of the game are there, albeit studying them isn’t really a trivial task! Some of those bytes are program code (in Z80 assembly), some are game data. We can’t easily tell which is which, nor what the format is for all this data. Old video games didn’t use standardized engine or data format, and everything was custom-made by programmers for a given piece of hardware. For the purpose of learning how the original game worked, it was my job to decypher this. We call this process Reverse Engineering!
I used a disassembler to convert the binary data into Z80 assembler code. This is what Z80 code looks like:
 029C: 21 AC 02     ld hl,02ACh
 029F: 11 6C CF     ld de,CF6Ch
 02A2: 06 14        ld b,14h
 02A4: 7E           ld a,(hl)
 02A5: EF           rst 28h
 02A6: 12           ld (de),a
 02A7: 23           inc hl
 02A8: 13           inc de
 02A9: 10 F9        djnz -07h (02A4h)
 02AB: C9           ret
 02AC: 26 80        ld h,80h
 02AE: A2           and d
 02AF: 81           add c
 02B0: FF           rst 38h
 02B1: 82           add d
It’s not easy to read! Even after learning about the Z80 CPU instructions set and how to program on a Z80, we are left with disassembled code where most of the offsets/numbers/addresses (such 02ACh or CF6Ch) have no explicit meaning. So we have to learn how the Master System hardware works. With the help of an emulator coupled with a debugger, such as MEKA (by yours truly), we can step in the code while it is running to examine the machine state. Our goal will be to find what each of these addresses contains, and what each piece of code is used for.
I first had do a lot of guesswork to start untangling this mess. By looking at individual blocks of code, trying to understand what they do, I could start roughly labelling them (“this function at address XXX might be used to control movement of the crabs”). By looking at RAM memory dumps while the game is running, I slowly managed to build a bigger picture of where the game stores its data (“variables for the player are stored around address XXX”, “variables related to scrolling may be there”, etc.). By hacking into the ROM I could test hypotheses as to how the game handles its data. I could then trace how levels are stored in-engine while the game is running, back to how they are stored in ROM on the cartridge itself (often following steps of unpacking and decompression, as ROM wasn’t cheap back in the days and storage had to be reduced).
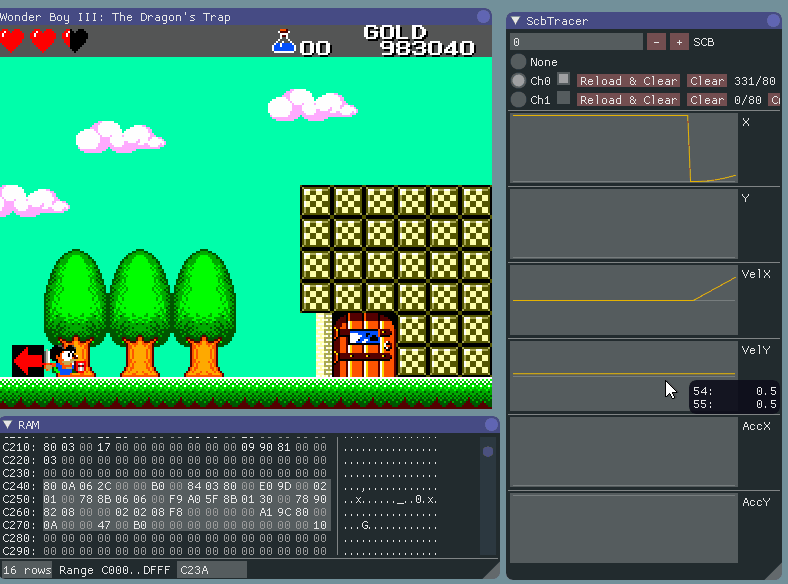
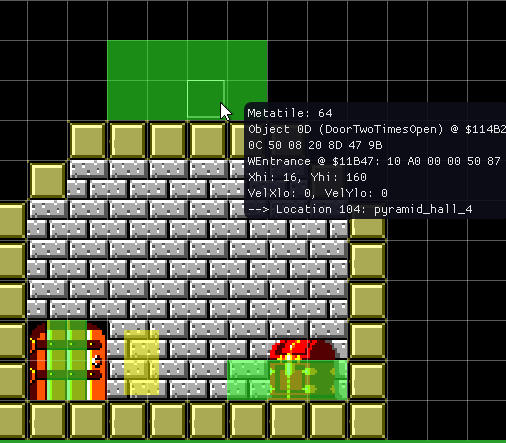
Rinse and repeat for weeks, then months. It was a long and tedious process but eventually things started to converge and allowing me to build a much more detailed understanding of the game logic. Being able to extract all the level data meant I could confirm the location of secret doors. Studying code meant I could understand what drives the item drops and attack logic. In order to understand the game physics, one of the techniques I used was to capture and graph various memory locations while the original game was running. I built a custom emulator and added all sorts of memory visualization and hooks:
With all things adding up, this allowed us to start developing a new game with a good level of understanding in regards to how the original worked. Of course, we will stray away from the original! We want the new physics to be smoother, as the original only ran at 30 FPS. For the new version we are doubling that. We want to go from 4:3 ratio to widescreen. Armed with that knowledge we can be certain that we won’t overlook details from the original. So when we make other changes and additions to the game, we will make them intentionally and not accidentally.
While this is only a small part of the work involved to create a new game, it was a necessary first step to achieve our target. Laying out this knowledge foundation means that our new game will be able to follow on the footsteps of what made the original great.
Only from there will we be able to make an even greater version!